Creating a seismic interpretation
The first step in the Seismic Interpretation workflow on the prepare > Seismic strip is creating a seismic interpretation (an empty 'placeholder' at this stage). This seismic interpretation will store either imported surfaces (interpreted in another application and which you can assign to the seismic interpretation in the next step of the workflow) or surfaces that you interpret within the application, see Structural interpretation of seismic data. You can modify the name of the seismic interpretation as well as the names of the survey and seismic volumes folder with which the seismic interpretation it is associated.
The seismic volumes folder is a placeholder for seismic volumes of the same domain (time/depth) in a survey, and for the seismic interpretations that you can associate with these volumes.
To create a seismic interpretation:
- Open the Create Interpretation form (prepare > Seismic > Create Interpretation).
- Make sure Create new is selected in Interpretation, and enter a name for the interpretation underneath.
- Specify the Survey the interpretation is to be part of, and then which Volume folder it is associated with. The default volume folder is a depth folder.
- Click OK to create the interpretation and proceed to the Assign Data form to assign surfaces. In the JewelExplorer, in the Seismic Surveys folder, the created interpretation appears under the specified survey & volume folder.
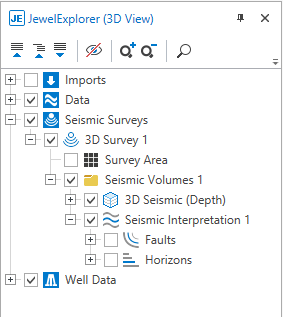
In the JewelExplorer, you will find your seismic volume(s) and your seismic interpretation(s) under the Seismic Surveys folder click to enlarge